Electric rifles are the functional backbone of our hobby, making up the good majority of what players choose to arm themselves with for a day out at the field. Airsoft likely wouldn’t be anywhere near as large as it is today without their inception, as their economical price point and user friendly operation make them the ideal grab-and-go primaries for players that simply want to sling some BBs down range. Despite how simple they are to use, their internal mechanisms are rather complex compared to their gas powered counterparts. The abundance of small springs, wires, and crucial washers can easily vex an unfamiliar hobbyist taking a look at an electric rifle’s gearbox. In this article, we’ll solo out every common part found in an electric rifle to provide a resource for explaining each part’s function and tendencies. We’ll explore installation tips, upgrade ideas, and general advice regarding how each part should be treated and installed. The AEG need not be a confusing mess of gears and springs.
There are A LOT of unique AEGs out there in the airsoft world. Some of the more unique ones may have proprietary parts specialized to their specific system. To keep it brief, I’ll be exploring the parts that most AEGs share in common. Externals too are a wildly varying topic, so the main focus will be on what’s under the hood of your electric rifle. We’ll first take a look at the hopup components (responsible for your BB’s range, accuracy, and feeding) then make our way onto the comparatively more complicated gearbox system. Let’s get familiar with the most dominant rifle system in all of airsoft, shall we?
Section I: The Hopup Assembly
Inner Barrel
Much like a real rifle, the projectile of your airsoft rifle will be shot through a metal barrel to stabilize flight trajectory and build up enough pressure before being blasted down range. Unlike a real rifle, however, an airsoft inner barrel is polished smooth for maximum air seal and performance. Airsoft BBs gain their range through the backspin applied by the Bucking & Nub (which we’ll get into later), and thus have no need for internal rifling. The smoother your inner barrel’s internal polish, the more consistent your shots will be at range. Small inconsistencies in the inner barrel can have minor effects on the air cushion that surrounds the BB as it travels.
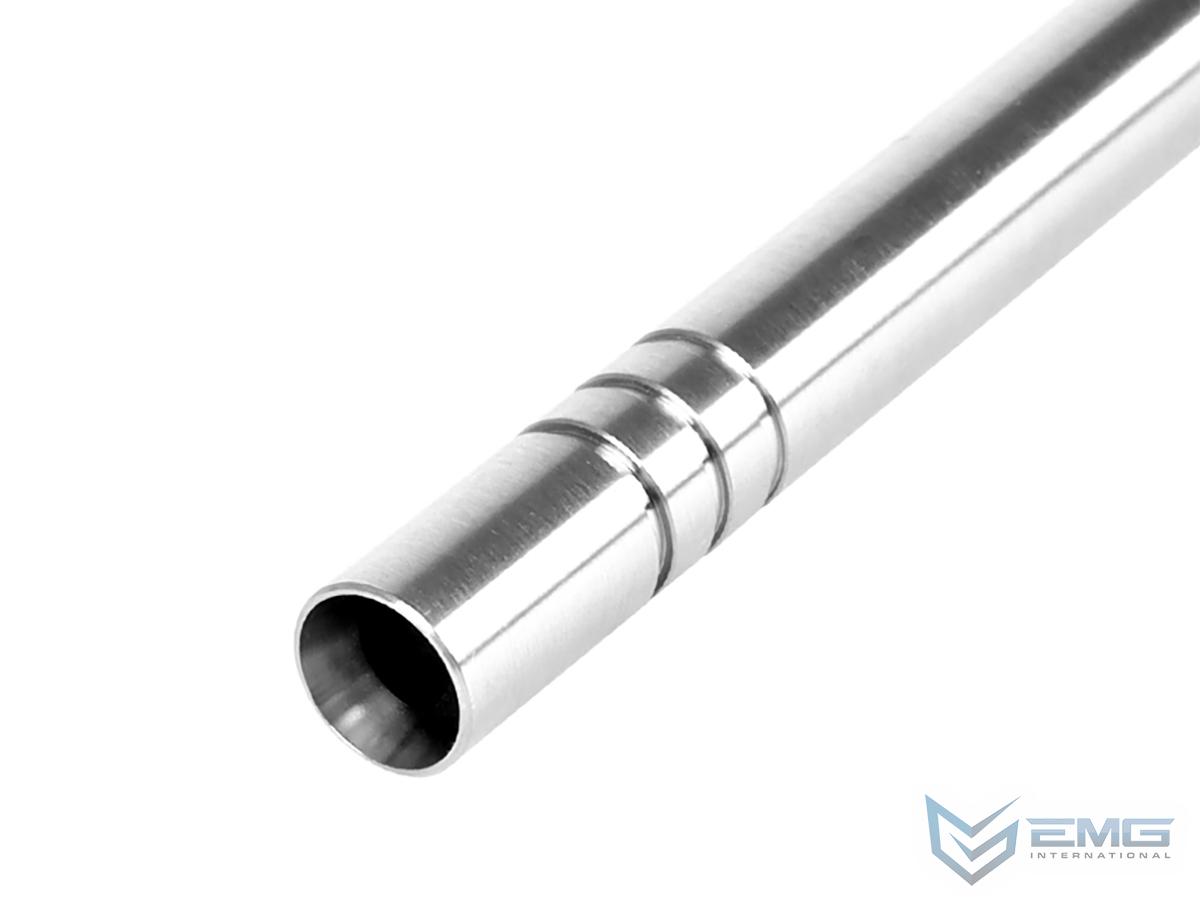
I highly recommend Prometheus inner barrels if you’re looking to upgrade.
Newer inner barrels will have a beveled “crown” at the endpoint in order to let the air cushion surrounding the BB push it a tad bit further down range. Larger inner barrel diameters (6.05mm+) will resist jamming from larger BB consistencies and provide extra range when paired with high compression setups. Tighter inner barrels (6.03mm-) can provide slightly higher FPS and tighter groupings in setups with minimal vibrations (such as HPA and Snipers). The most important factor in an inner barrel’s ability to shoot accurately is the quality of its polish and the cleanliness of its condition.
Hopup Unit
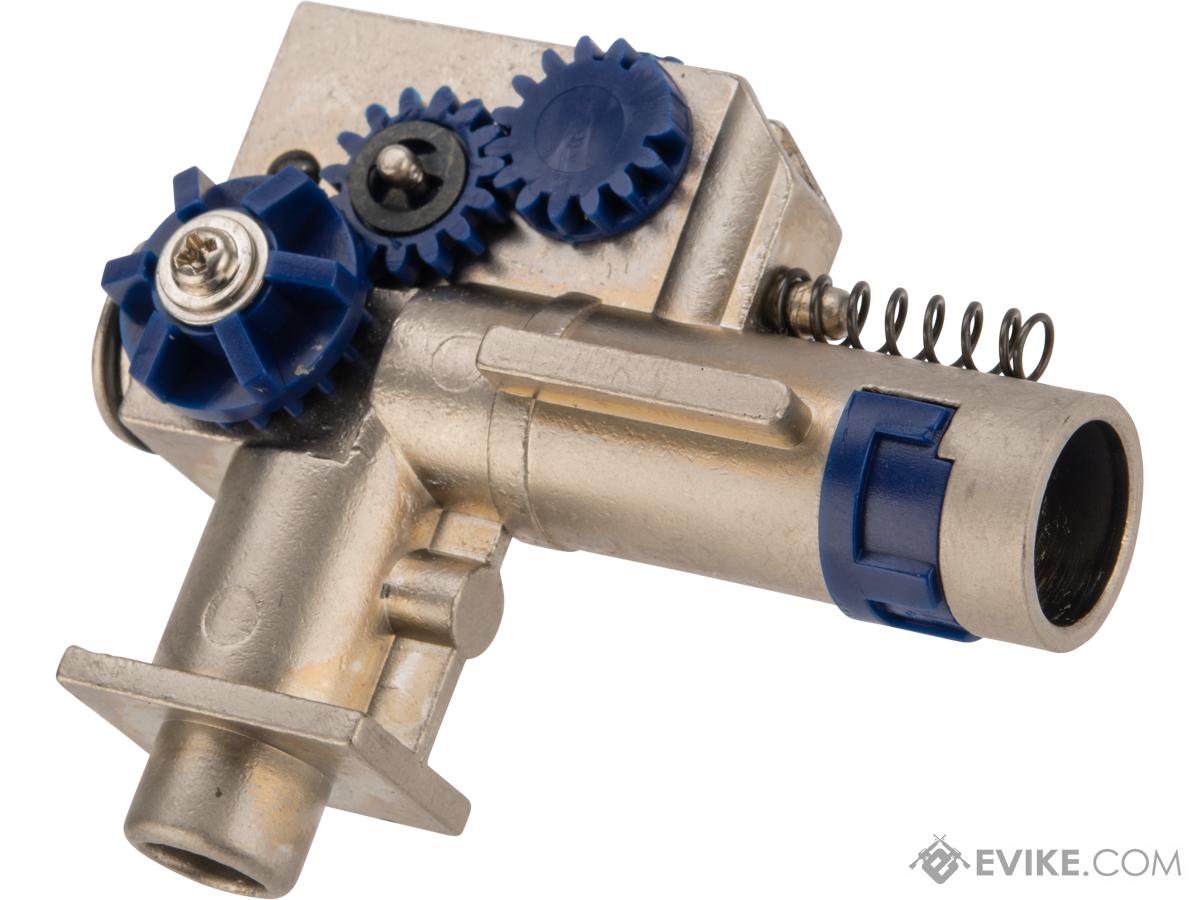
Acting as the rifle’s “chamber,” the hopup unit intakes BBs from the magazine and houses the bucking and inner barrel. A hopup unit can be adjusted with a dial to change how much backspin is applied to your BB, allowing you to optimize your rifle’s range and accuracy. By adjusting the dial, you change how much contact the bucking makes with the top of your BB. If it makes too much contact, the BB may jam. Too little and your BBs will roll out of the barrel and not fly very far. A good hopup unit will provide proper air seal between your gearbox and inner barrel.
A hopup unit acts most effectively when it fits well with the parts it interacts with. So long as it seals air and applies consistent pressure to the bucking, the hopup is doing its job. While there are a myriad of upgrade hopup units on the market, their performance is dependent on how well they support the parts that they house more so than the material of their construction.
Bucking
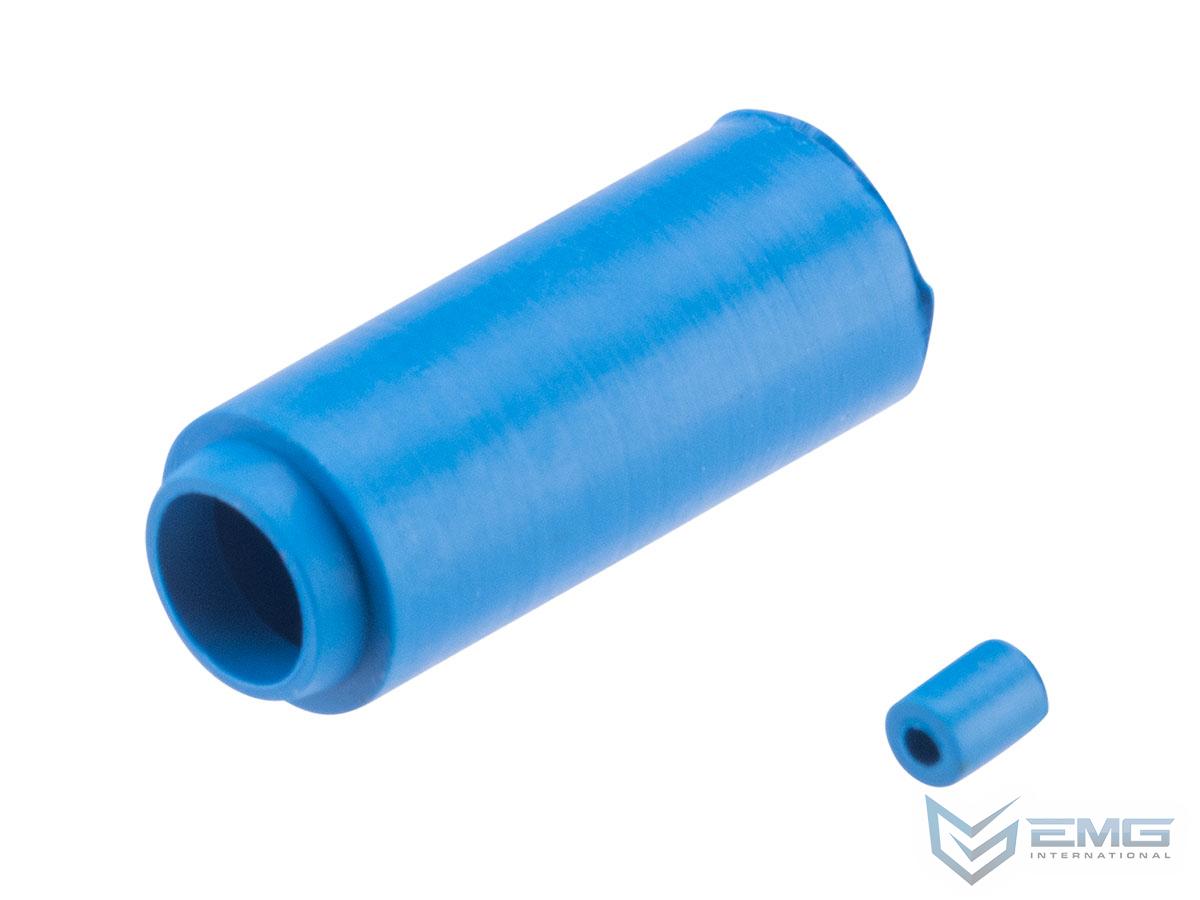
Despite being a small inexpensive rubber sock, the bucking is arguably the most important internal component for defining your range and accuracy. It fits around your inner barrel and has a “patch” that makes contact with the BB through the inner barrel’s cut window. The lips of your bucking meet against your nozzle to seal air as your BB flies down your inner barrel. There are a variety of different bucking styles on the airsoft market that all aim to achieve better range and accuracy, though each have their own unique pros and cons.
The nub is the corresponding tiny rubber bit that applies pressure to your bucking patch. It is the piece that pushes down on your bucking as you adjust your hopup settings. If you’ve worked on your hopup and notice it’s not hopping BBs very well, check to see if your nub is still there!
Hardness
Hopup buckings vary in rubber hardness. Softer rubber materials will perform better with lower FPS rifles, as they can more easily compress through a lower power system. Harder buckings will compress less as the BB flies through them, making them optimized for higher FPS setups.
Patch Type
It’s become common for airsoft rifles to come with unique, upgraded bucking patch types right out of the box. The shape of the rubber that makes contact with your BB has a major impact on it’s flight performance. “Standard” buckings are simply a rounded rubber bump that aims to apply a light amount of backspin with minimal chance of jamming. The good majority of airsoft rifles come with a standard bucking patch as they work best with lighter BB types, which is what many manufacturers expect newer players to use. Some bucking patches are cut into a “V” shape for better accuracy at the cost of heavy BB performance, and some have a “flat” patch for improved performance with heavy ammo. Some combine features of both. For any player looking to expand their rifles range and accuracy, I generally recommend using a “flat” style patch with BBs in the 0.28-0.32 weight range.
The best bucking for your airsoft rifle is highly dependent on your setup and parts. Using a bucking, hopup unit, or inner barrel that doesn’t marry up well with their adjacent parts can cause double-feeding and jamming. Take caution when adjusting these parts! Don’t change too much at once!
Section II: The Gearbox: Compression Parts
Cylinder
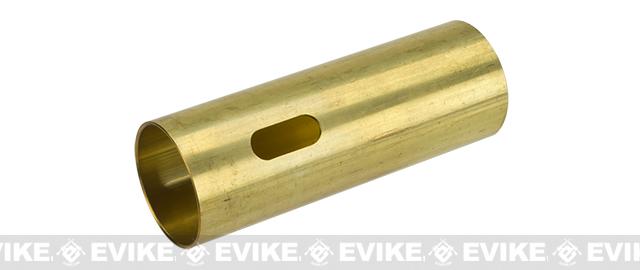
An electric airsoft rifle uses an automatic air-compression mechanism to generate enough pressure to send a BB soaring down range. The Cylinder is the metal tube where that air is compressed, making it an essential component of your AEG’s functionality. They’re usually made of one of three materials: Brass, Aluminum, or Steel. Higher grade cylinders will have an internal PTFE coating to improve air seal within the system. Cylinders can be worn down over time if metal shavings and polluted grease scratch against its internal surface.
Some cylinders have air ports built into their side that change the volume of compressed air generated. Cylinder volume optimization is a complex topic deserving of its own article, but generally it’s ideal to match your cylinder’s volume with that of your inner barrel length.
Cylinder Head
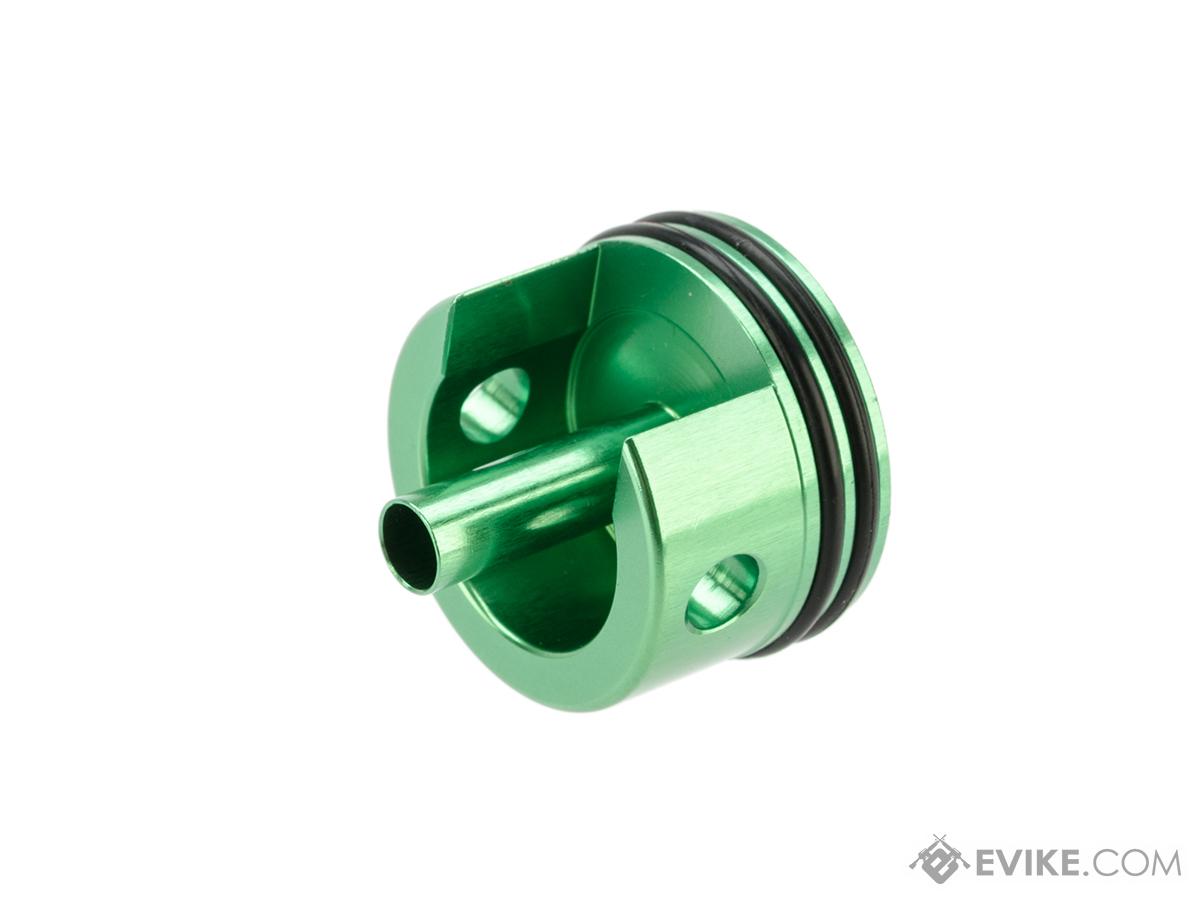
The cylinder head is responsible for sealing off the front end of your cylinder and properly guiding your nozzle forward. Higher end models will be constructed out of aluminum to prevent shattering and have an extra o-ring for better air seal. The rings on the side of the cylinder head are what they use to lock into the gearbox shell, and some models might fit differently then others. Good fitment is more important than material for this component.
Piston
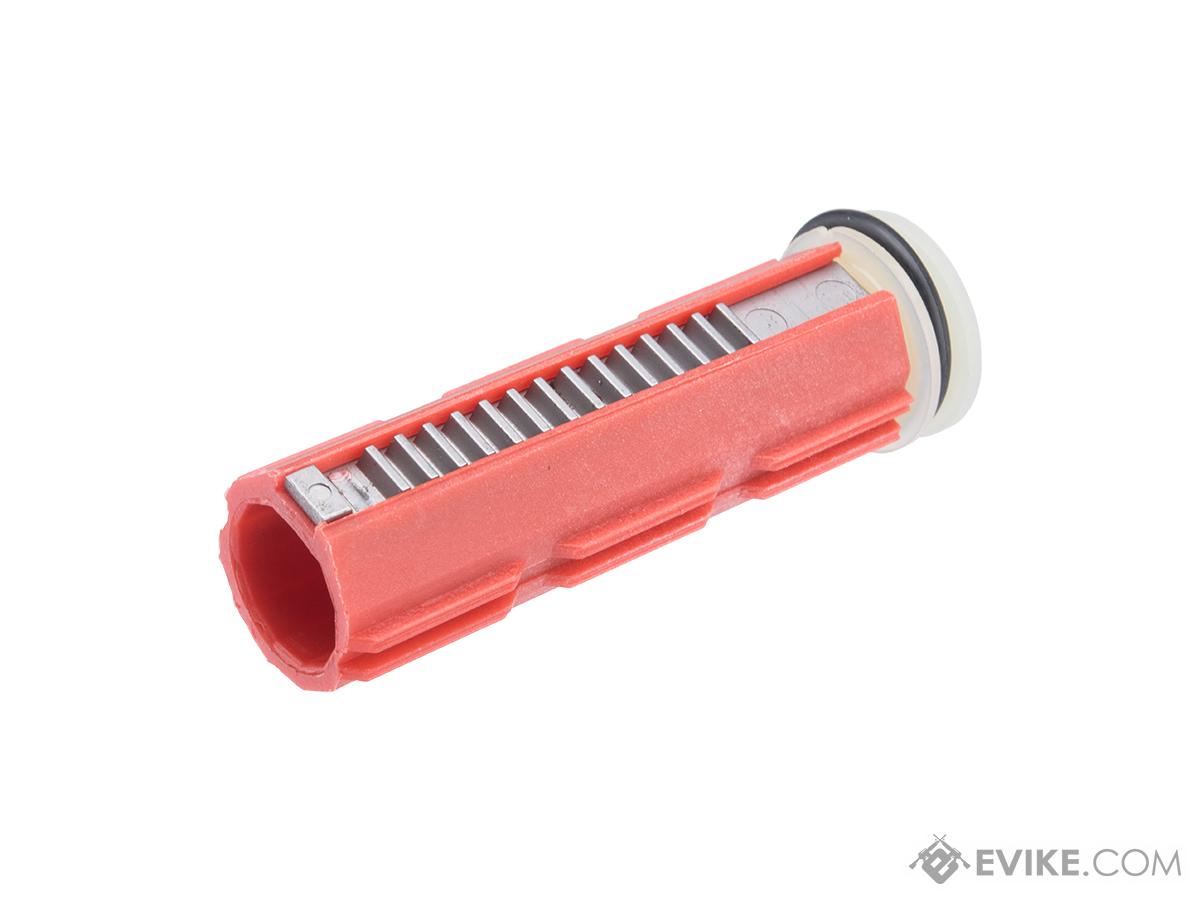
To generate air compression inside the cylinder, a piston is pulled back against a heavy spring. When the piston is released, it rapidly shoots forward, generating the high pressures that propel a BB forward. This part serves as your AEG’s essential drive train. Its ability to withstand the constant shock of being shot forward and pulled back is crucial to your AEG’s longevity. Lower end rifles tend to have polymer teeth pistons, which serve their purpose fine in low stress builds while cutting down on cost. More modernized airsoft rifles come equipped with full-steel tooth pistons capable of handling heavy stress loads. The amount of teeth on your piston is dependent on the amount of teeth of the sector gear that it engages with. Some pistons (like the one pictured below) will have some of the pickup teeth shaved off in order to reduce the risk of your gears prematurely engaging with the piston before it’s cycle is completed.
Piston Head
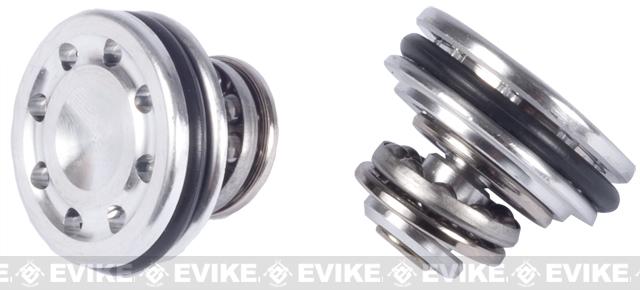
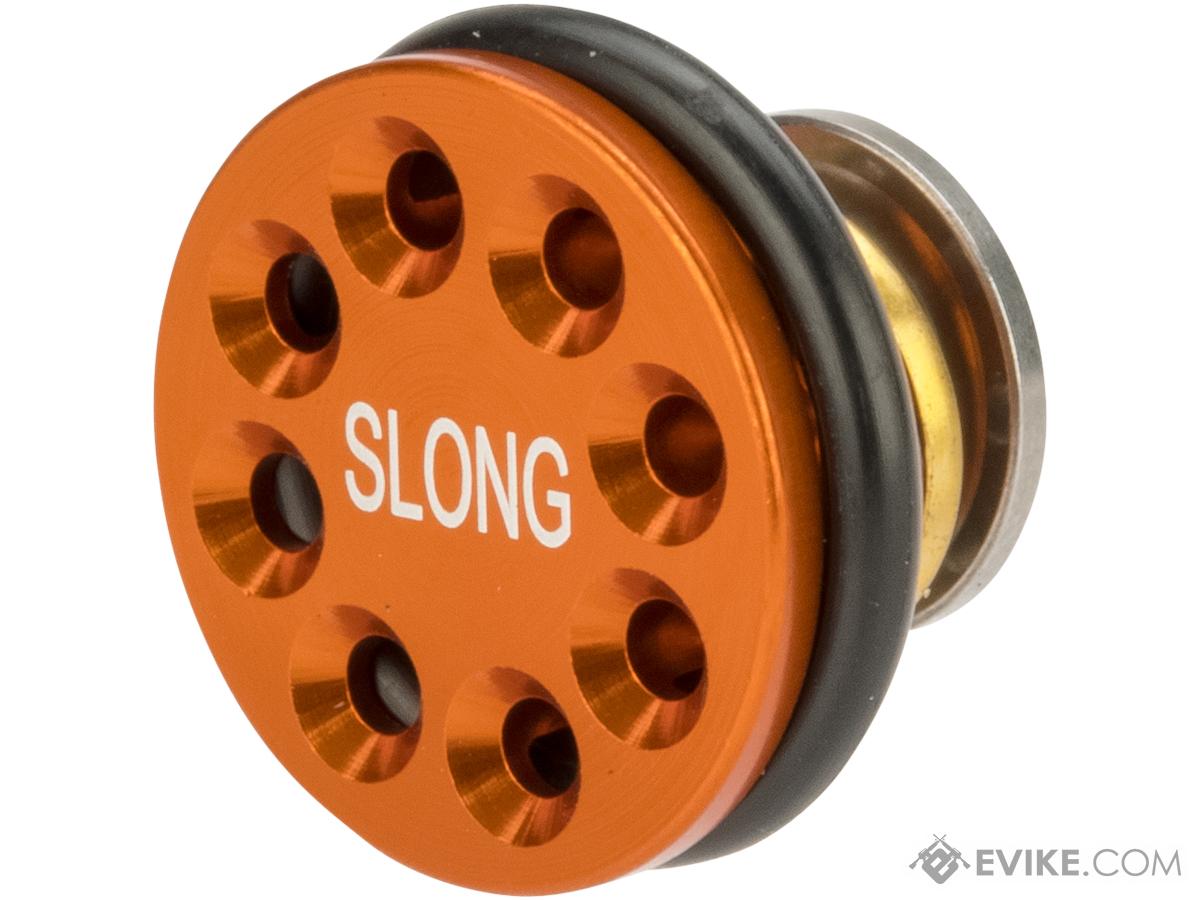
The piston interacts with the rifle's gears, while the piston head interacts with the cylinder to generate compressed air. As the piston head retracts in the cylinder, its ported holes allow air to fill the vacuum in the cylinder. The o-ring surrounding it seals against the cylinder to provide compression, generating an immense amount of pressure when the high powered spring launches it forward. Aluminum piston heads are more durable than polymer piston heads, though some players may opt for the lighter polymer if they’re trying to reduce weight in their system’s drive train. The quality of the O-ring itself has a major impact on how good of a seal the piston head can provide. This o-ring can easily wear down if exposed to gear grease and metal shavings, which can accumulate in rifles hastily put together in a factory. A clean gearbox is essential to your piston head o-rings health and longevity.
Some piston heads will come with a bearing disk. This disk goes inside your piston from where the spring pushes it, ideally reducing wear from spring torsion.
Nozzle
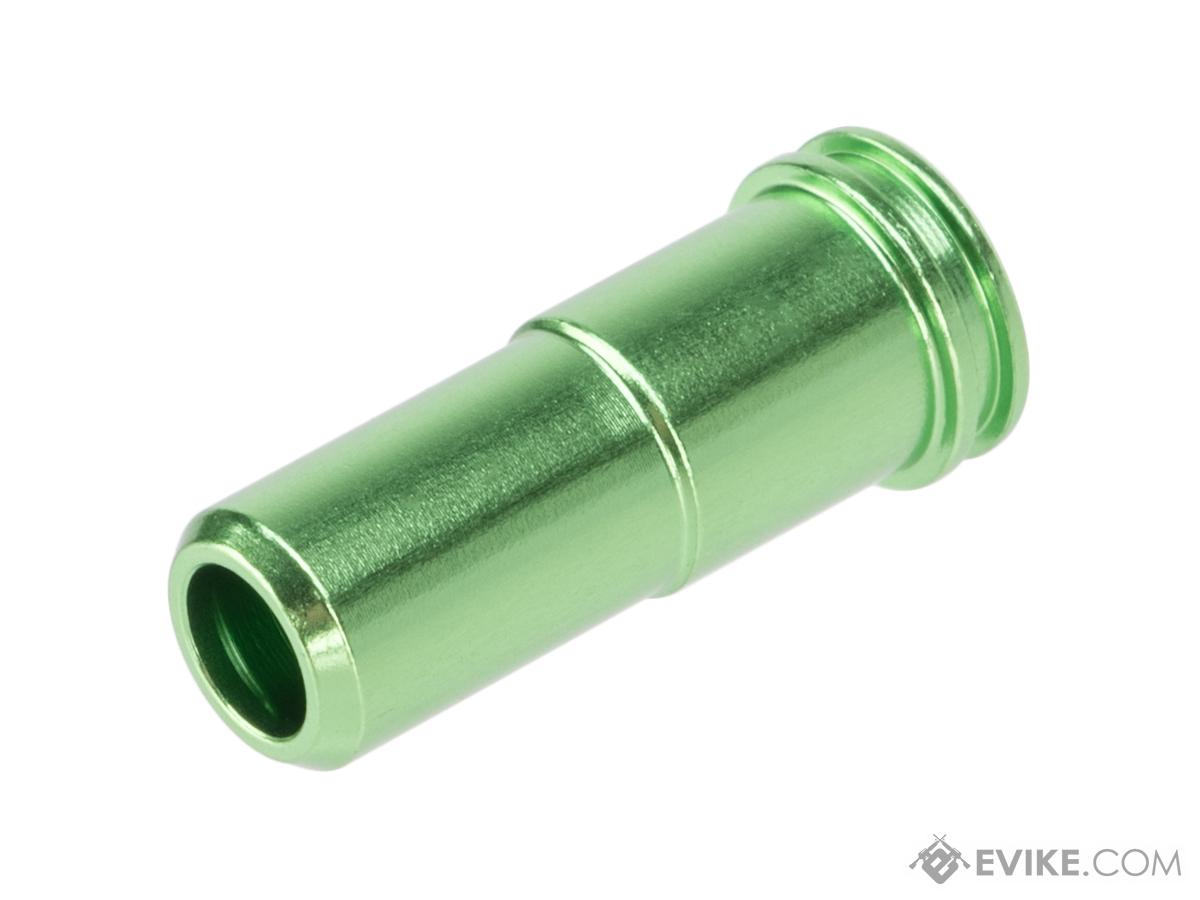
After air is compressed in the cylinder, it blows out through the nozzle to fire off a BB. The nozzle serves two purposes: 1. Seal the bridge between your cylinder and bucking 2. Chamber the next BB securely in the hopup unit. The nozzle finds itself housed atop Higher end nozzles will have an internal o-ring that helps provide better air seal against the cylinder head, and aluminum nozzles will be more durable than polymer ones. Some nozzles have two internal o-rings, but I find that this only slows down operation and provides no better seal than a single o-ring. A nozzle needs to be able to move freely enough to chamber a BB before the main spring compresses air in the cylinder.
Tappet Plate
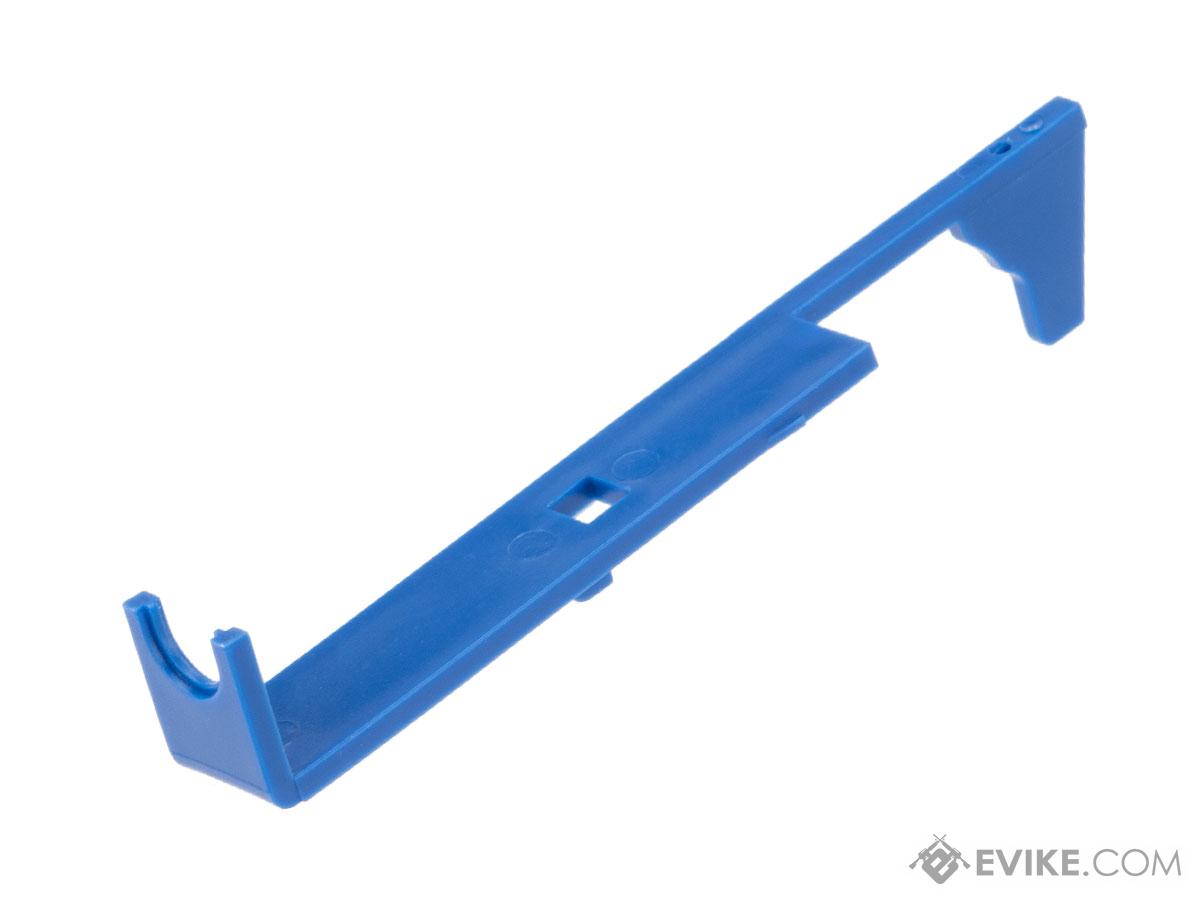
In a gearbox, the timing of when each spring is engaged and released is crucial to the system’s functionality. Your nozzle’s timing and ability to chamber a BB is controlled by the tappet plate, which is a plastic bar that retracts a specific time during a gearbox cycle. The C shaped end clips into your nozzle, and the other is the portion pulled back by a notch on the sector gear. Generally, there aren’t any particular “upgrade” tappet plates, as they all tend to be constructed out of the same material. It’s not uncommon to accidentally break these when opening up a gearbox shell. Take caution!
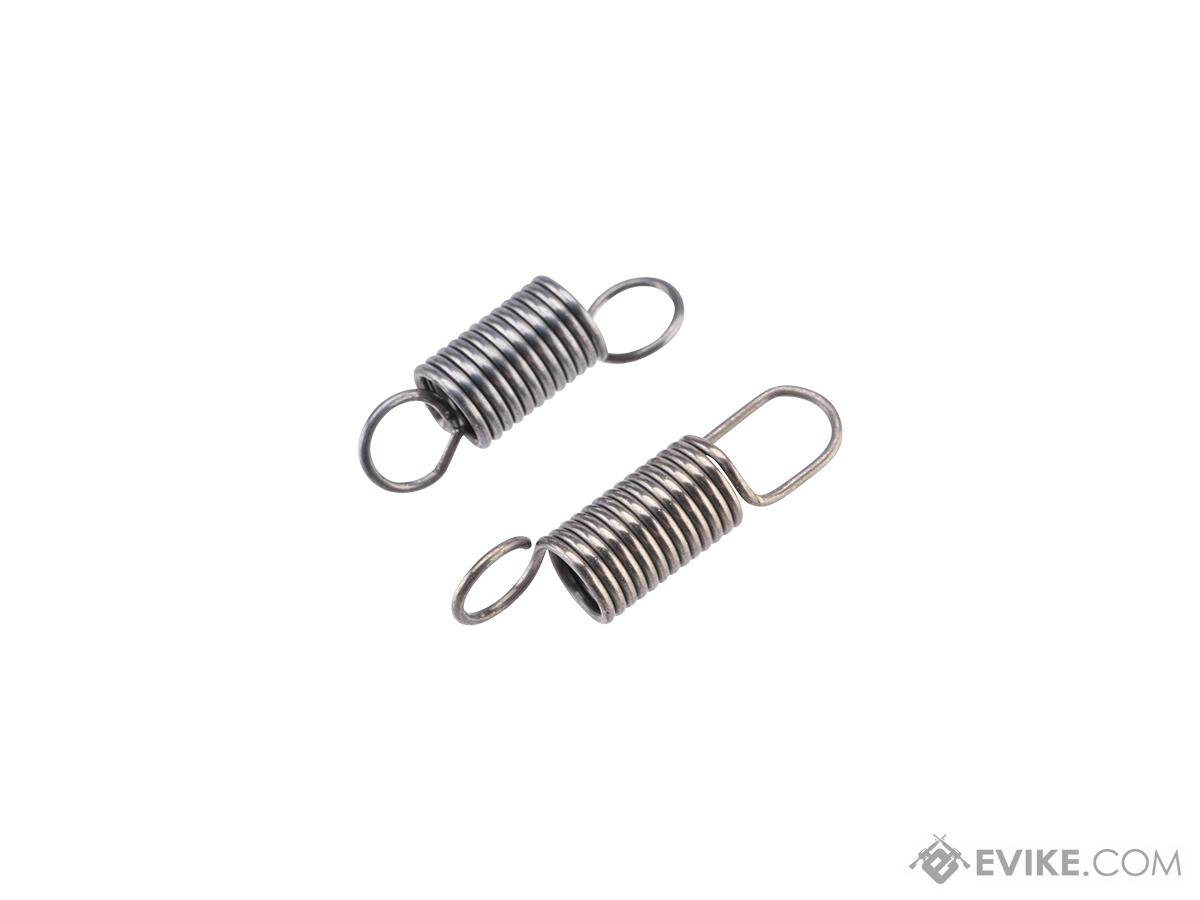
Underneath the tappet plate lies the Tappet spring, which is what pulls the plate forward after the sector gear retracts it back. A stronger tappet spring will push the nozzle forward with more force, but puts more stress on the components it’s attached to. Always press down on your nozzle after putting a gearbox together to ensure the tappet plate and spring are moving smoothly.
Main Spring
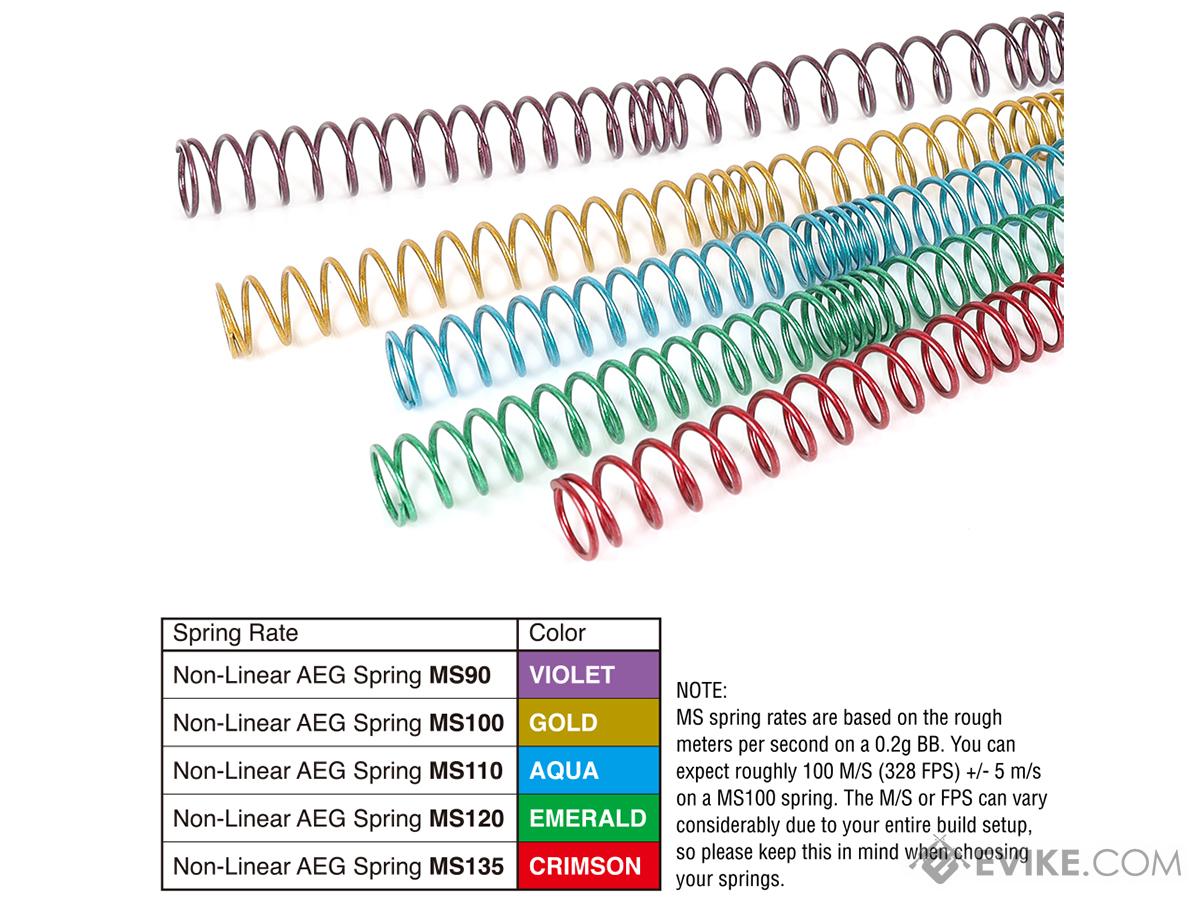
Though one of the most straightforward parts of your AEG’s internals, AEG springs have a few quirks about them worth taking into consideration. The strength of this spring is a good determinate of the velocity of your gun. Determining a spring’s strength by “feel” or thickness alone is both difficult and easily deceiving, which has lead to many manufacturers adding color to their springs (as seen above) to make it more clear. Some springs are “irregularly pitched,” which means that the spacing between the coils isn’t linear throughout the whole spring. This is done to reduce the amount of force needed at the beginning of the spring’s compression, improving the lifespan of your piston and ideally reducing stress on the motor. The “M” rating of a spring simply refers to its expected meters per second velocity in a standard setup. Many variables other than the main spring can affect FPS. Poor compression, improper hopup assembly, short stroking, and short inner barrels can lower your velocity. I’d highly recommend ironing out issues like these before dropping in a higher power spring.
Spring Guide
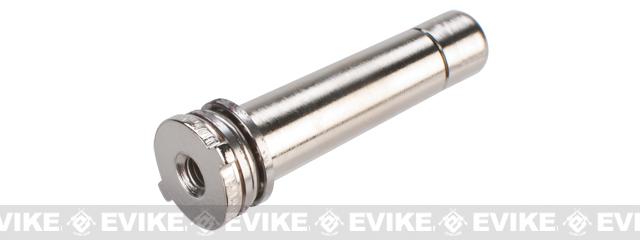
As the name implies, the spring guide helps guide your main spring forward in the gearbox. Due to the high strength of AEG main springs, these guides are necessary to prevent them from bending out of place. Higher end spring guides will have bearings where the spring rests to reduce damage from binding and twisting. The screw hole in the rear of the spring guide is crucial to how many rifles attach their stocks.
Section III: The Gearbox: Gears, Electronics, and Mechanical Bits
Gearbox Shell
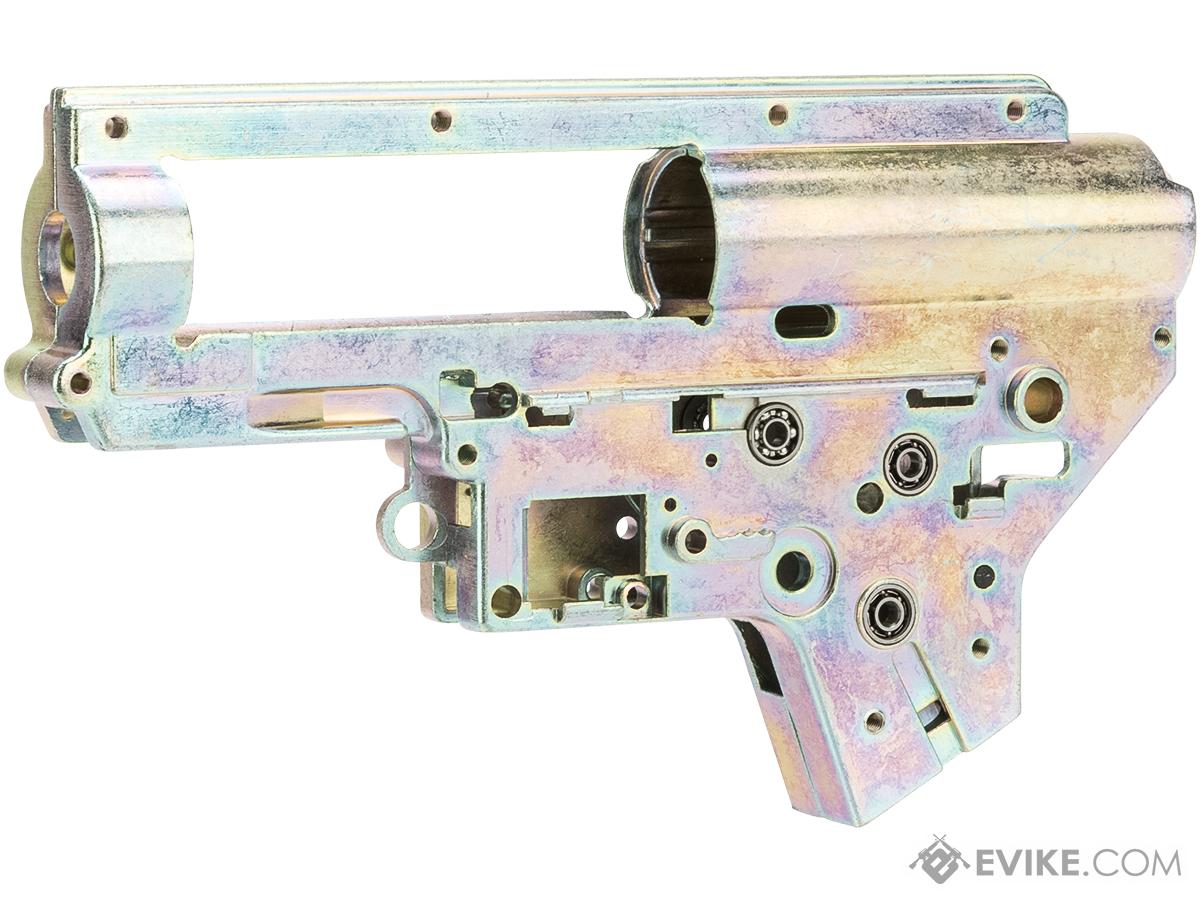
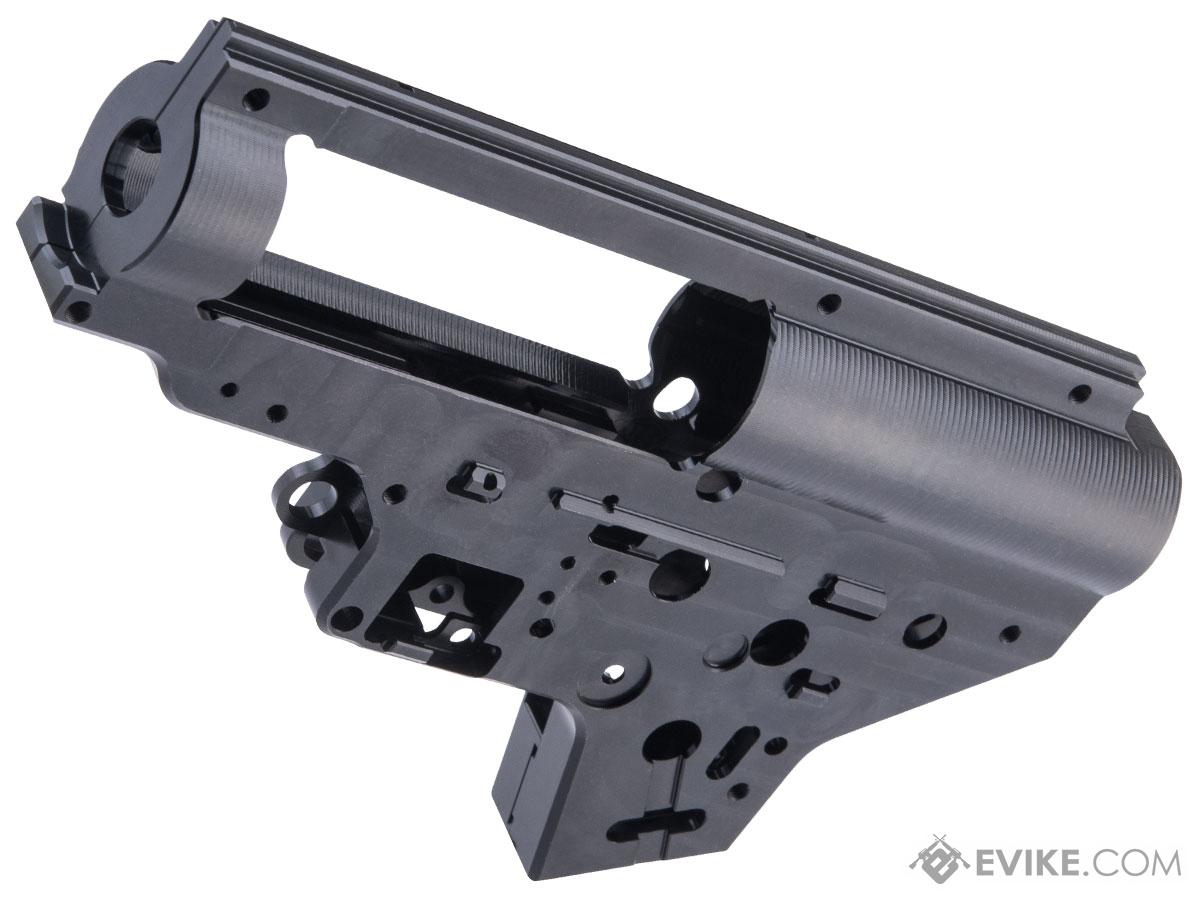
The gearbox shell serves as the housing for a good majority for your rifle’s mechanical components. Despite being little more than two machined metal sections screwed together, AEG gearbox shells have a fascinating array of nuanced details that can heavily impact your rifles longevity and how you interact with inspecting it. One of the most important things to look for in a modern AEG gearbox shell is a quick change spring system, which streamlines disassembly and velocity adjustments by allowing one to remove their main spring without fully deconstructing the gearbox. Older gearbox shells may not have this feature and are notoriously difficult to work on as a result. Newer gearboxes tend to have radial cuts around the cylinder area to reduce the risk of fracture lines forming and a “shim window” around the bevel gear that aids in assessing gear alignment. Depending on the brand, each AEG gearbox can have varying tolerances, spaces, and fitments with aftermarket parts.
EMG x Retro Arms CZ Billet CNC 8mm Ver.2 Gearbox Shell for M4 / M16 Series Airsoft AEG Rifles (Color: EMG Black)

Gears
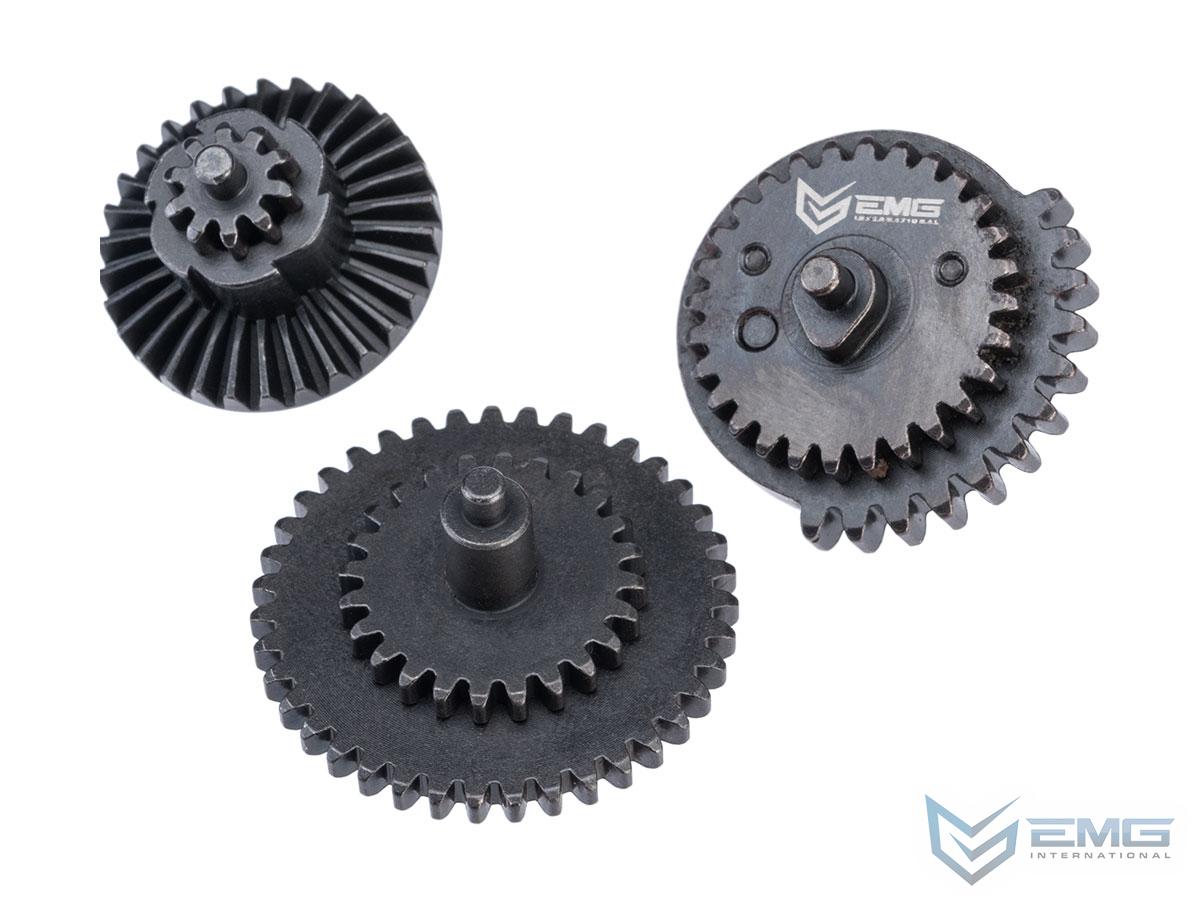
At the heart of every AEG lies a four (sometimes five) piece gearset responsible for pulling back the piston and tappet plate with every cycle. Standard AEG gears typically come in an 18:1 ratio, which is generally a balanced torque/speed output. Some higher end rifles with higher rates of fire may come with gears at a 16:1/13:1 ratio output, and some with an added focus on reliability may float around 22:1. A lower ratio gearset will spin faster, but put added stress on the motor. It is important that each gear have a conservative amount of high adhesion grease at all contact points.
The four gears inside an AEG are:
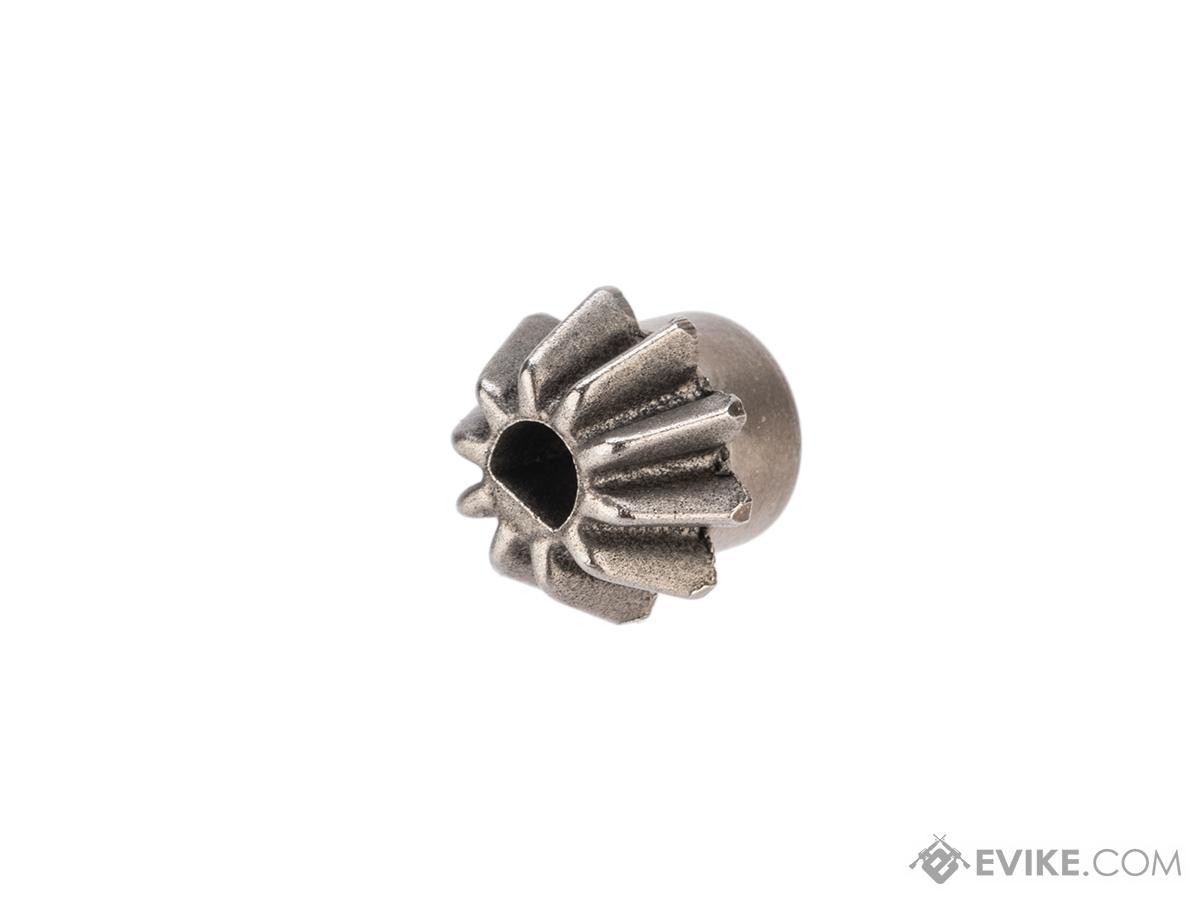
Pinion Gear
The pinion gear is directly attached to your motor and is the first gear in the system. They come in two iterations depending on your motor’s shaft type: O-Type, which is friction fit on, and D type, which is set with a grub screw. It’s height in the gearbox can typically be adjusted with the screw underneath the motor.

Bevel Gear
The bevel gear is named after its beveled design and is the first gear axled in your gearbox. Good connection between this gear and the pinion gear is crucial to the functionality of your gearbox.
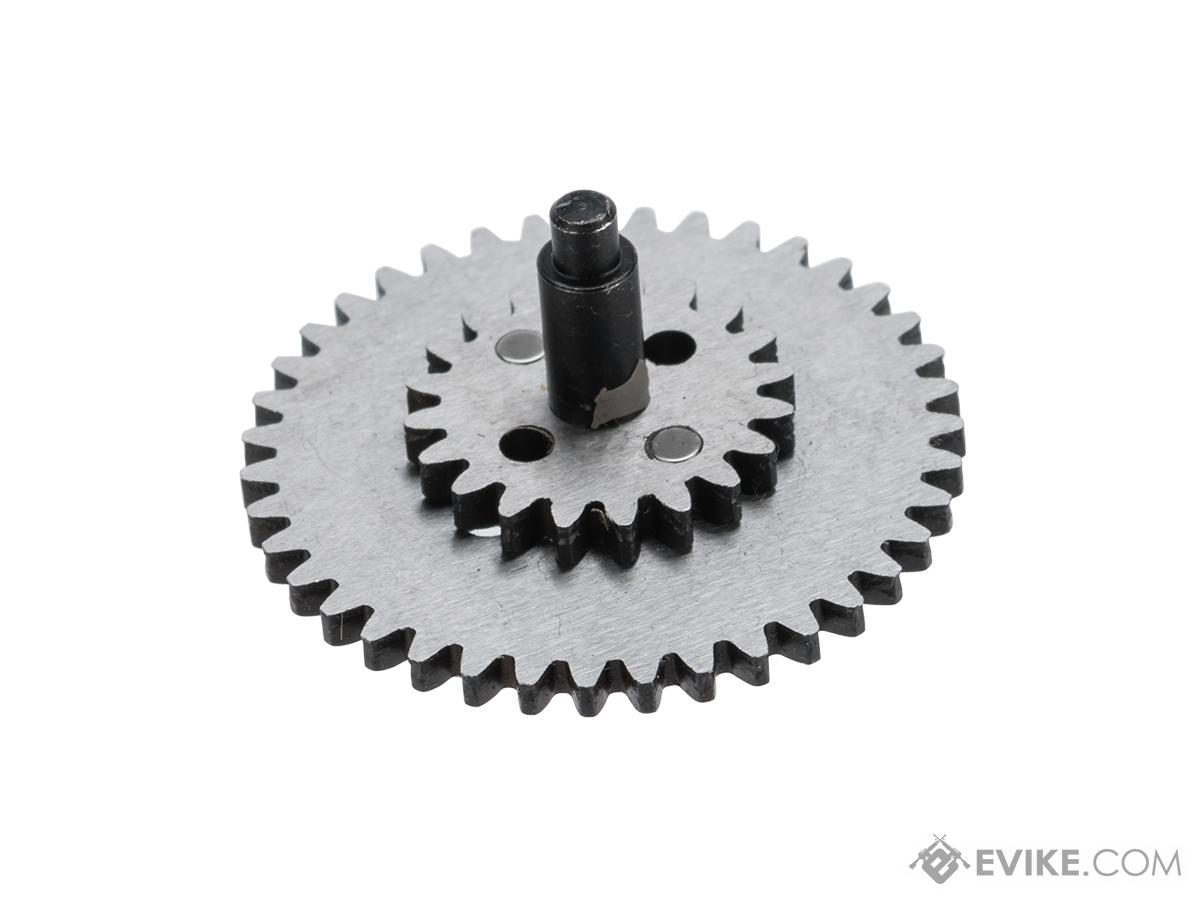
Spur Gear:
The spur gear is the center gear within your gearbox and mainly acts as a connective piece and ratio adjuster between the bevel and sector gear. Different gear ratios will have different amounts of teeth on the spur.
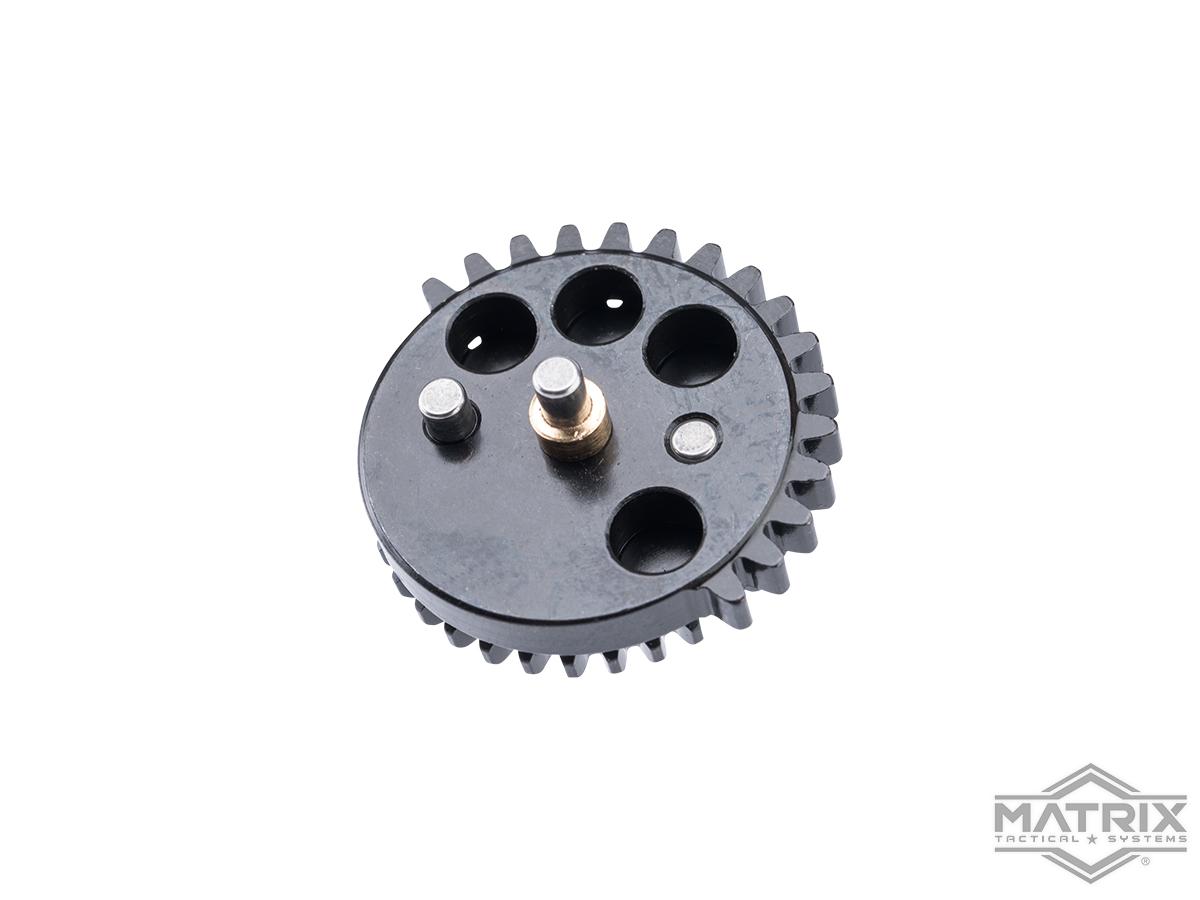
Sector Gear
The sector gear is the gear that interacts with your tappet plate and piston. The top section of teeth retracts your piston for compression, and the notch on the inside pulls back your tappet plate with each cycle.
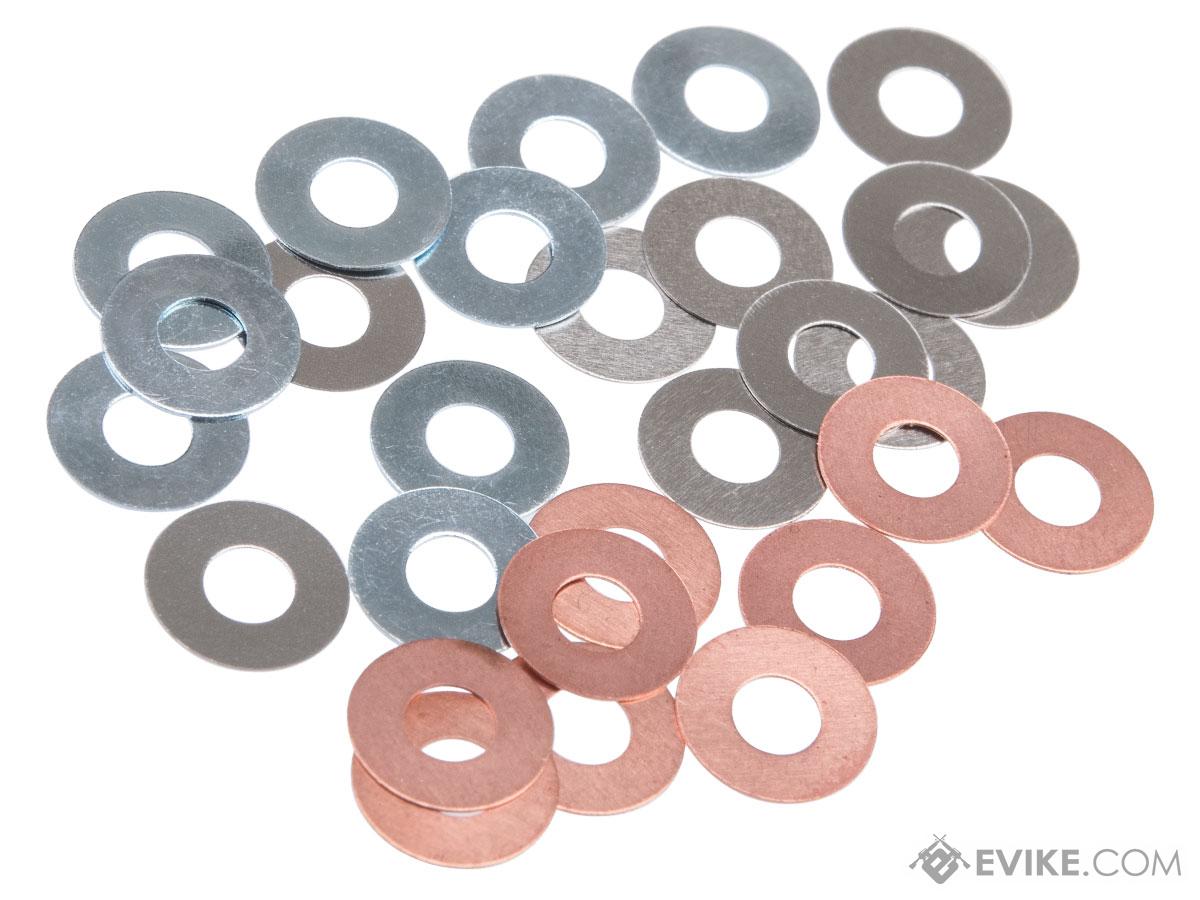
Shims/Washers
The alignment of your gears is crucial to the functionality of your AEG. Good gear alignment (aka good shimming) is the key to a smooth sounding rifle. These metal washers allow one to adjust the spacing and height of each gear to best fit your gearbox shell and bushings. This can be one of the most time consuming processes when building an AEG gearbox, but there are many guides online that offer tips and tricks. Good shimming practices deserves an article of its own!
Bushings & Bearings

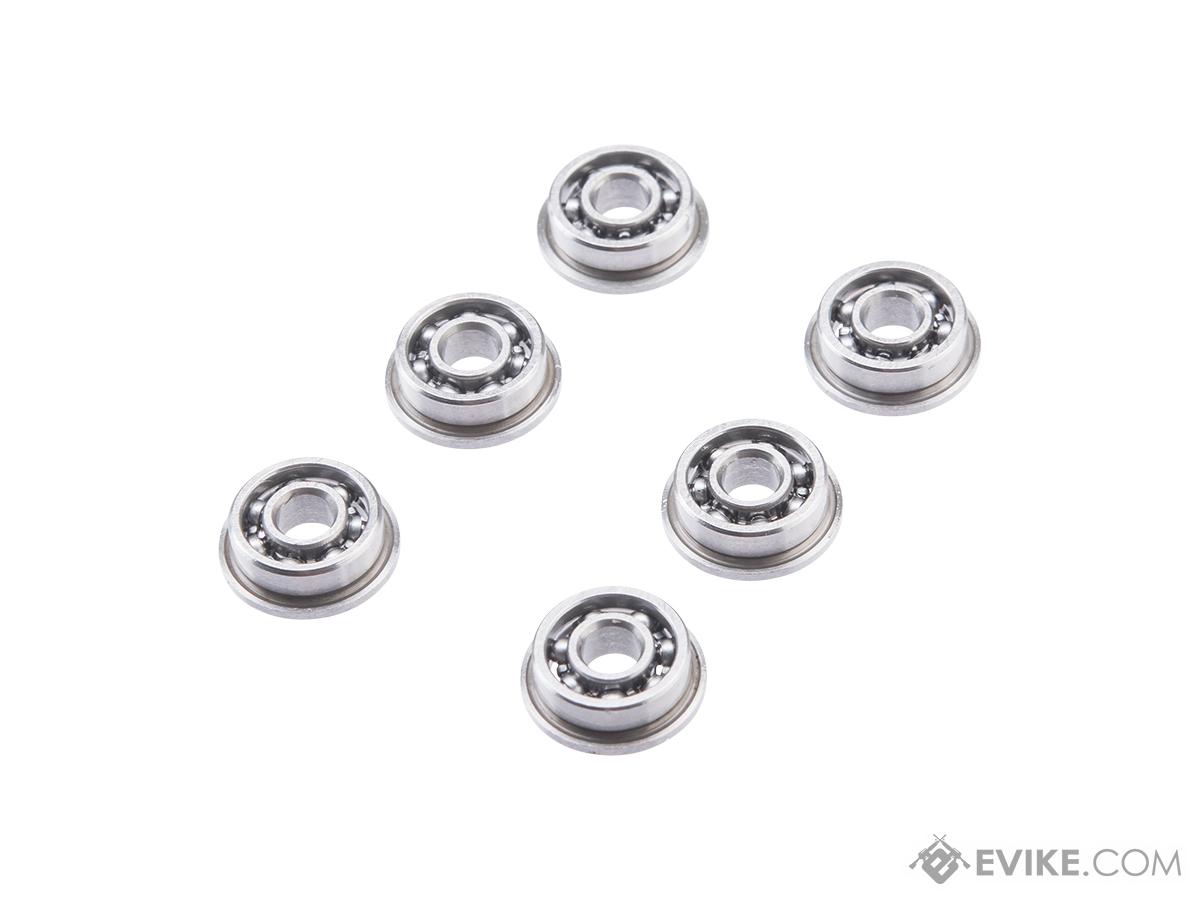
To decrease friction and improve gearbox longevity, your gear axles spin on tracks separate from the gearbox shell (or bearings). Bushings are solid steel for extra durability, while bearings offer even less friction by smoothly rotating along with your gears. High speed builds perform best with bearings, while high FPS/longevity oriented builds might be better suited for bushings.
Cut-Off Lever
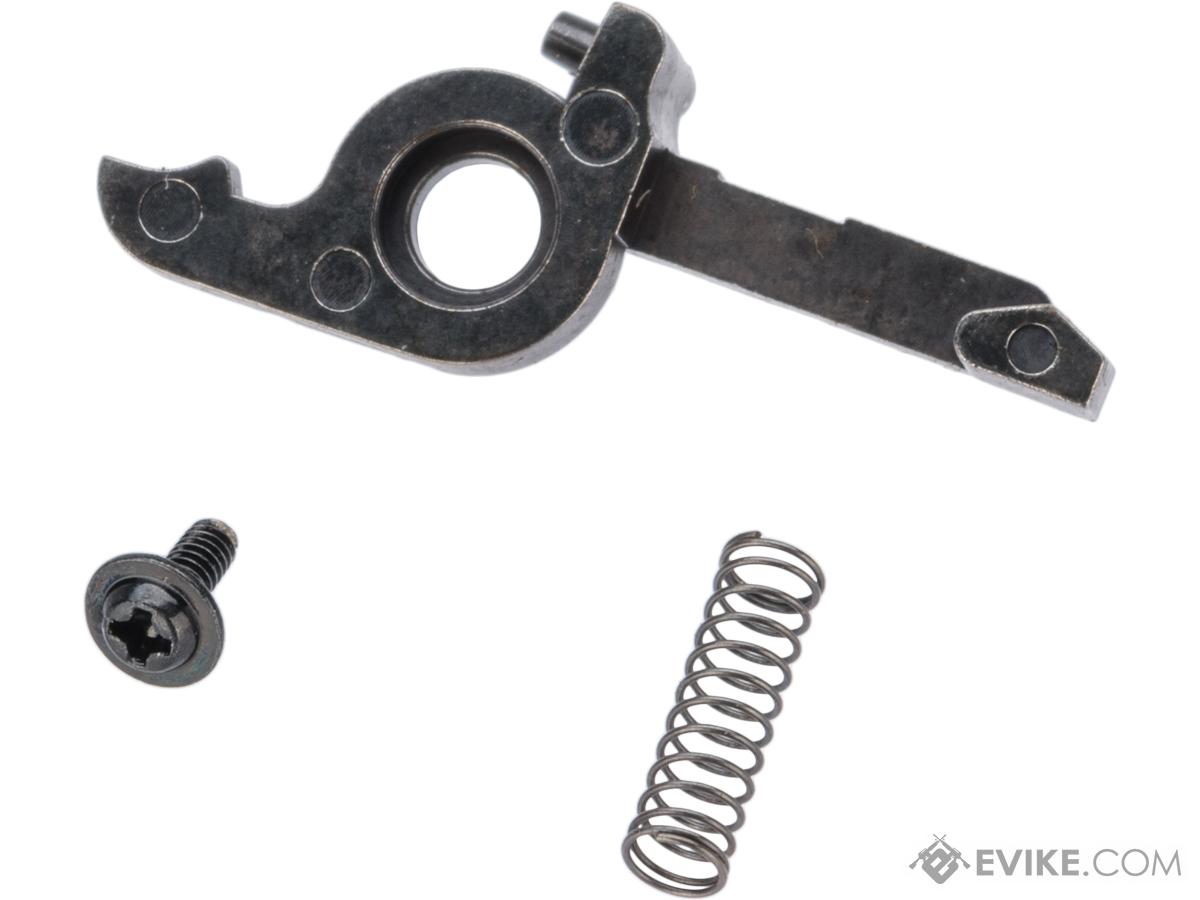
In a standard AEG with basic mechanical trigger contacts, fully automatic fire is mechanically easier to achieve than semi automatic. Once you pull the trigger, you push a switch forward that completes the circuitry, causing the motor to spin. If not for the cut-off lever, the motor would continue to spin until the trigger is released. After a single cycle of your sector gear (one semi-automatic shot), the cut-off lever engages to release your trigger switch from the actuation point. Essentially, it resets the switch after a full gear cycle. The cut-off lever spring pressurizes depending on the position of the selector plate, acting as the detection system for whether your rifle is semi-automatic or fully automatic. This spring is crucial to your rifle’s ability to fire in semi-automatic.
Anti-Reversal Latch
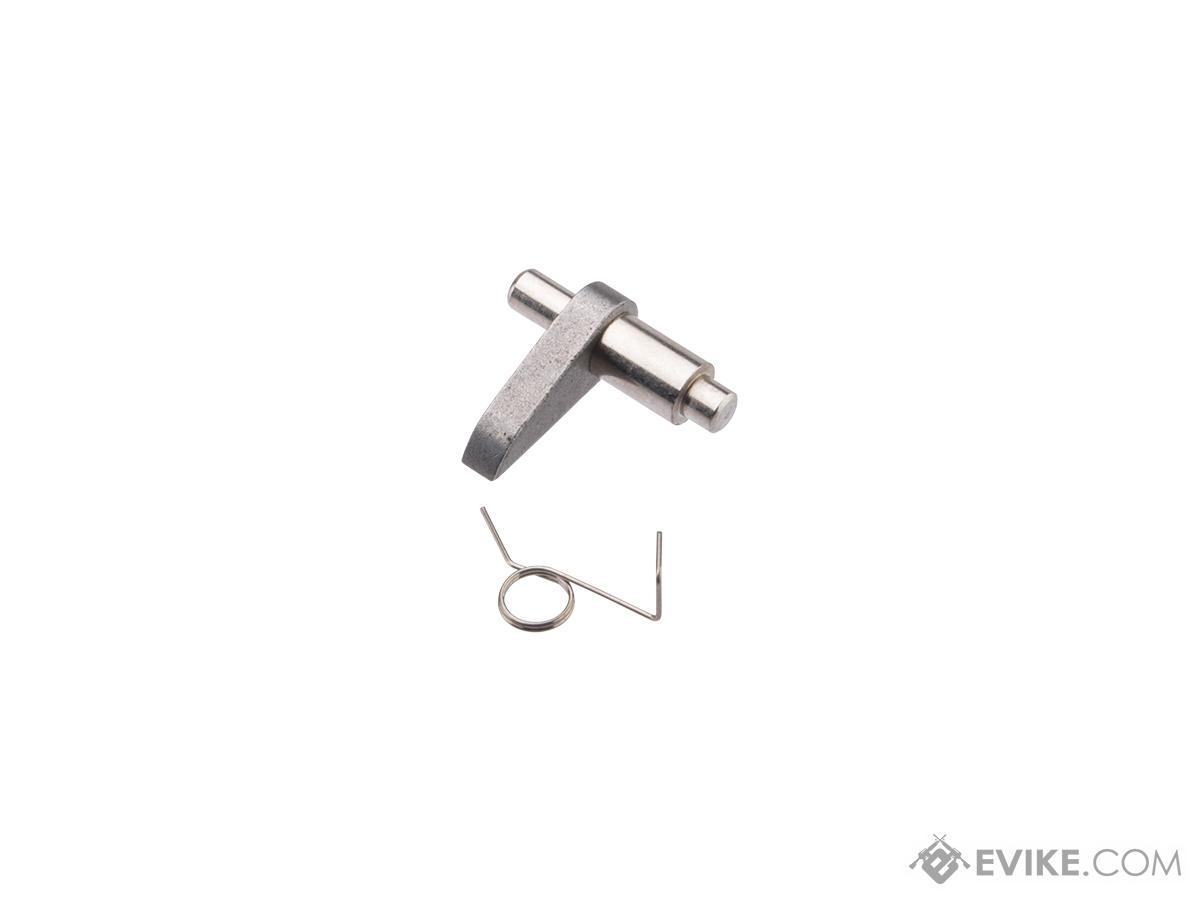
Gears in the gearbox are designed to spin in only one direction. If your gears happen to overspin after a cycle (which is normal!), the main spring will impart pressure in the opposite direction. Without the anti-reversal latch, your gears would begin to spin in reverse and possibly cause jamming/feeding issues due to improper tappet plate/spring pressure engagement. This metal bit locks against your bevel gear to prevent your gearset from rotating in the opposite direction. Always ensure that your anti-reversal latch can freely move when putting a gearbox back together!
Wiring, Electronics, & Trigger Assembly
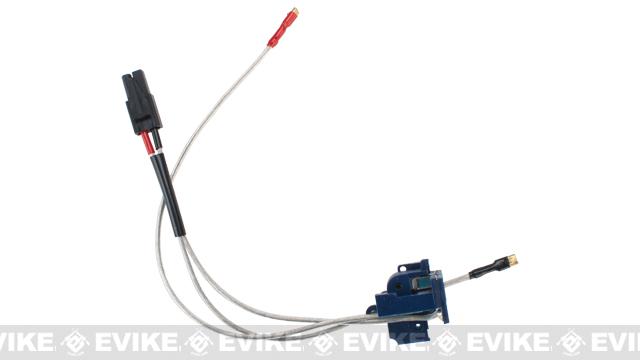
Depending on your rifle’s brand and model, this part can vary wildly in design. Most standard mechanical AEGs will use a switch system much alike what’s pictured above. There will be a “trolley” with a metal bit that is pushed forward by your trigger to complete the circuitry and activate the motor. After a shot is fired on semi-automatic, the cut-off lever will push the trolley up, releasing it from the connection point. There is an additional spring atop the trigger trolley to allow it to retract after a shot is fired. This design is incredibly simple and is time-tested to be a reliable solution for AEG trigger operation. More modern AEGs might come out of the box with a fully electronic replacement for this trigger system that allows for faster semi-automatic performance and programmability, much alike the following:
MOSFET Systems
At its simplest, a MOSFET is an electronic unit that redirects current towards a source by taking strain off the actuating switch. Many AEGs come with basic MOSFET systems that don’t replace a rifle’s standard trigger contacts, but simply reduce the amount of current needed to flow through them. Integrated electronic trigger units can vary widely in how many parts they retain from the original mechanical trigger system. For more information on these, check out this article: https://www.evike.com/articles/9_Microswitches-and-MOSFETs-Demystified-The-Secret-Behind-a-Fast-Trigger/
Selector Plate
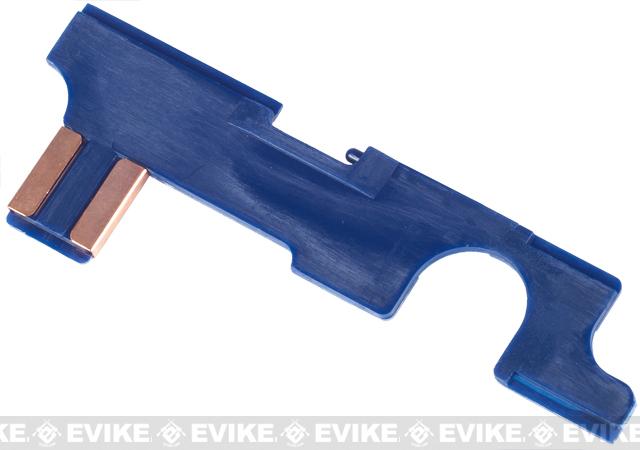
Found on the outside of your gearbox shell, the selector plate is the mechanism that moves along with your selector switch to change operation within the gearbox. In a standard mechanical AEG, pushing the plate forward applies spring pressure to the cut off lever and engages semi automatic fire. In safe, the plate will engage a plastic stopper than prevents the trigger from moving. In full automatic, the plate will relieve pressure from the cut-off lever spring to allow for fully automatic fire.
Trigger
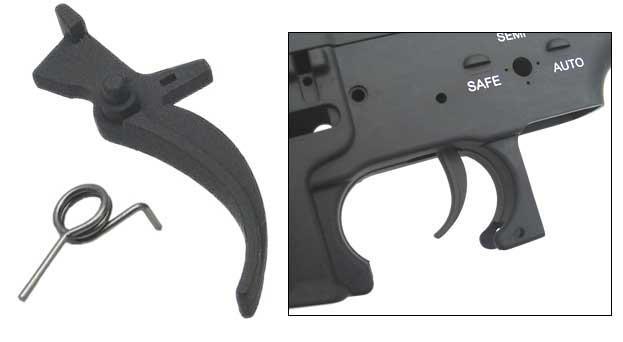
The trigger engages your AEG’s mechanism of motor actuation. It’s operation is often assisted through a trigger spring that allows it to reset after each fired shot. Different AEGs with different trigger systems may require a unique style of trigger to be used, though the most standard design is the one pictured above.
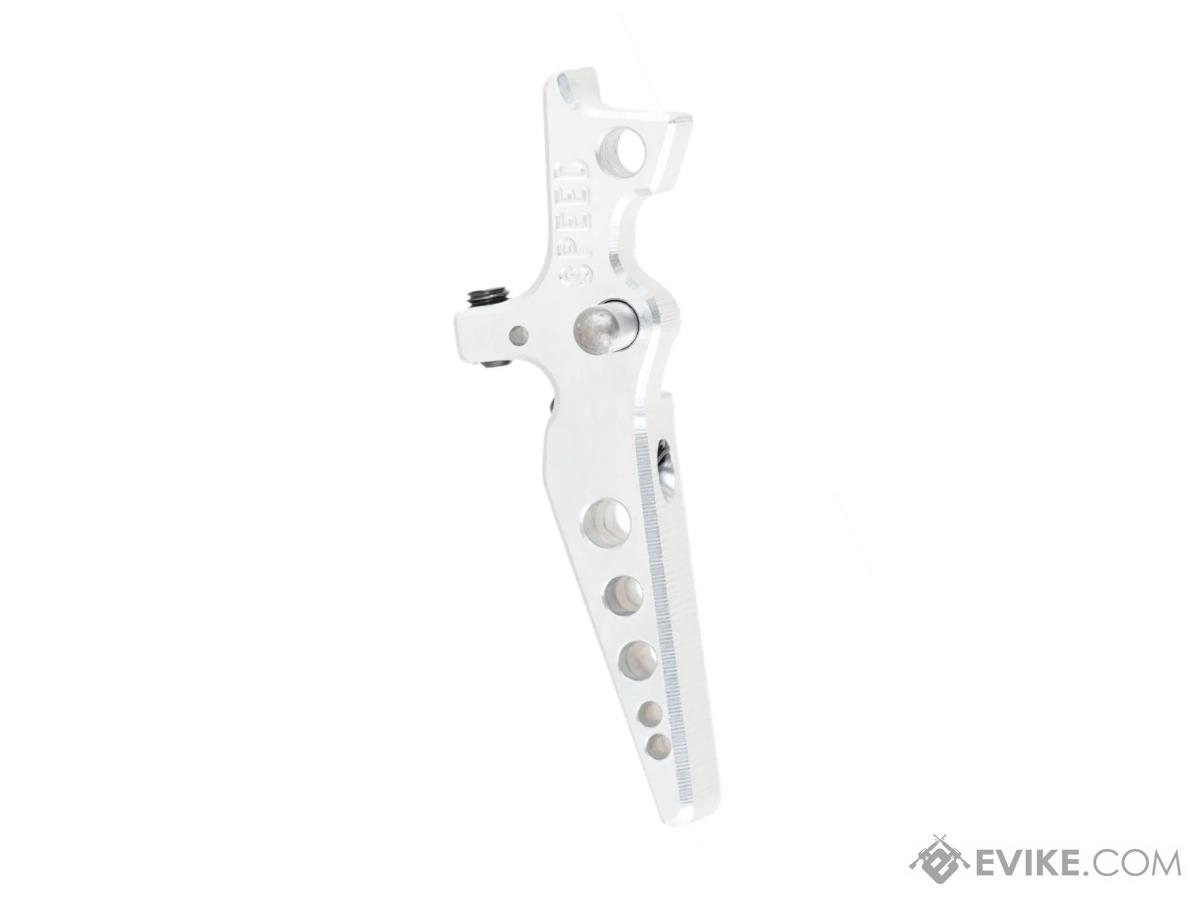
SPEED Airsoft Special Edition 2.0 Externally Tunable Trigger for M4 AEG Airsoft Rifles (Color: Silver/ Blade)

Motor
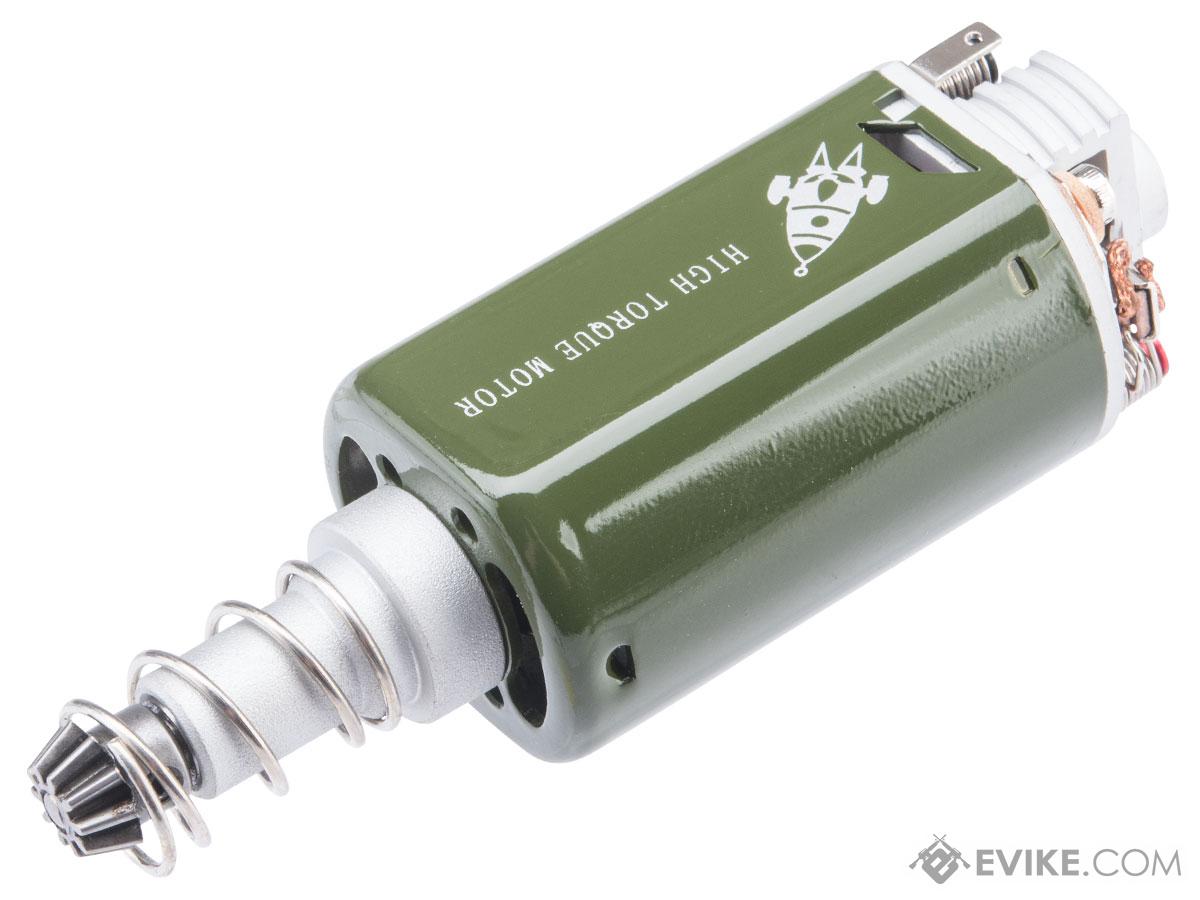
Your motor converts the electricity from your battery into mechanical output to power your AEG. Airsoft motors vary widely in speed and torque output, though most stock rifles opt for a low-power ferrous motor for best reliability. High torque motors utilizing neodymium magnets have grown in popularity for their ease of installation and quick ability to improve your AEGs rate of fire and semi-automatic snappiness, but also introduce more stress to your gearbox due to their higher operation speed. High speed motors will increase the full-auto rate of fire of your airsoft rifle, but can easily shred a gearbox not tuned properly for it. Your choice of motor should depend on your choice of gear ratio. The lower the ratio, the more torque you’ll need out of your motor to operate the system properly. For more information on airsoft motors, check out my article here: https://www.evike.com/articles/31_The-Easiest-Upgrade-Airsoft-Motors-Explained/
Airsoft AEGs can be complicated! With the tips and tricks provided in this overview, perhaps a gearbox’s strange amalgamation of nuts and bolts can seem a little simpler. If you’re planning to disassemble your AEG, I highly advise watching a disassembly video in full for your particular model before giving it a go. Does the process look like more effort than you’re willing to put in? Feel free to contact us at [email protected] for inquiries about having your rifle professionally worked on by our top-of-the-line techs! Even for the most experienced airsoft tech, gearboxes can be frustrating. Some springs just have a tendency to pop out of place, and it’s not uncommon for a seasoned technician to fully assemble a rifle just for something to not work quite right. If in doubt, take a step back and try again. Good luck with your future airsoft tech endeavors!


